Plan Creator
The Plan Creator is a powerful tool within the Project Planning module that streamlines the process of creating and managing project plans. Designed with managers in mind, this tool allows for the efficient creation of plans and their associated tasks, all within a single, centralized interface. Whether you're coordinating a small project or managing a complex initiative, the Plan Creator ensures that every task is clearly defined, assigned, and organized, enabling teams to work more effectively.
The Plan Creator is equipped with features that allow managers to assign tasks to specific team members, set deadlines, and establish task dependencies, all while maintaining an overview of the entire project through a dynamic Gantt chart. This visual representation helps in tracking progress and making adjustments as needed, ensuring that projects stay on schedule.
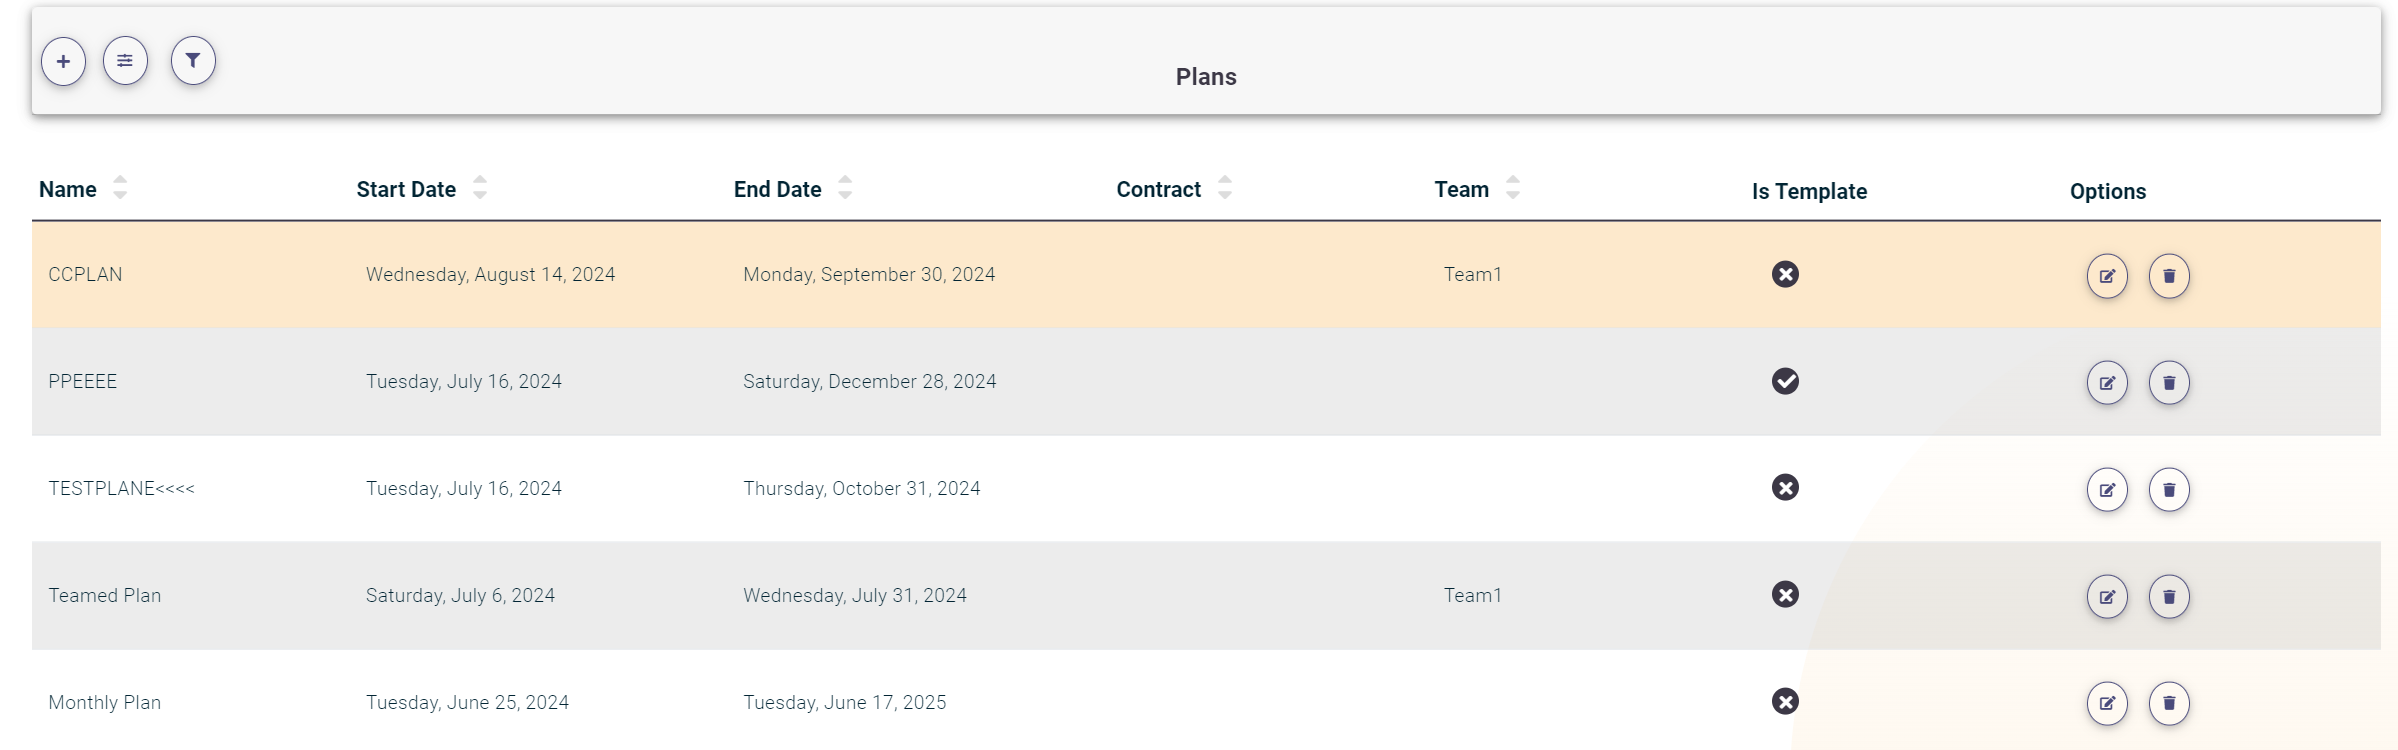
To begin using the Plan Creator, navigate to the "My Plans" Pages under the "Project Planning" menu, and click on the "+" icon at the top. This will open the Plan Creator interface, where you can start building your plan.
Creating a Plan
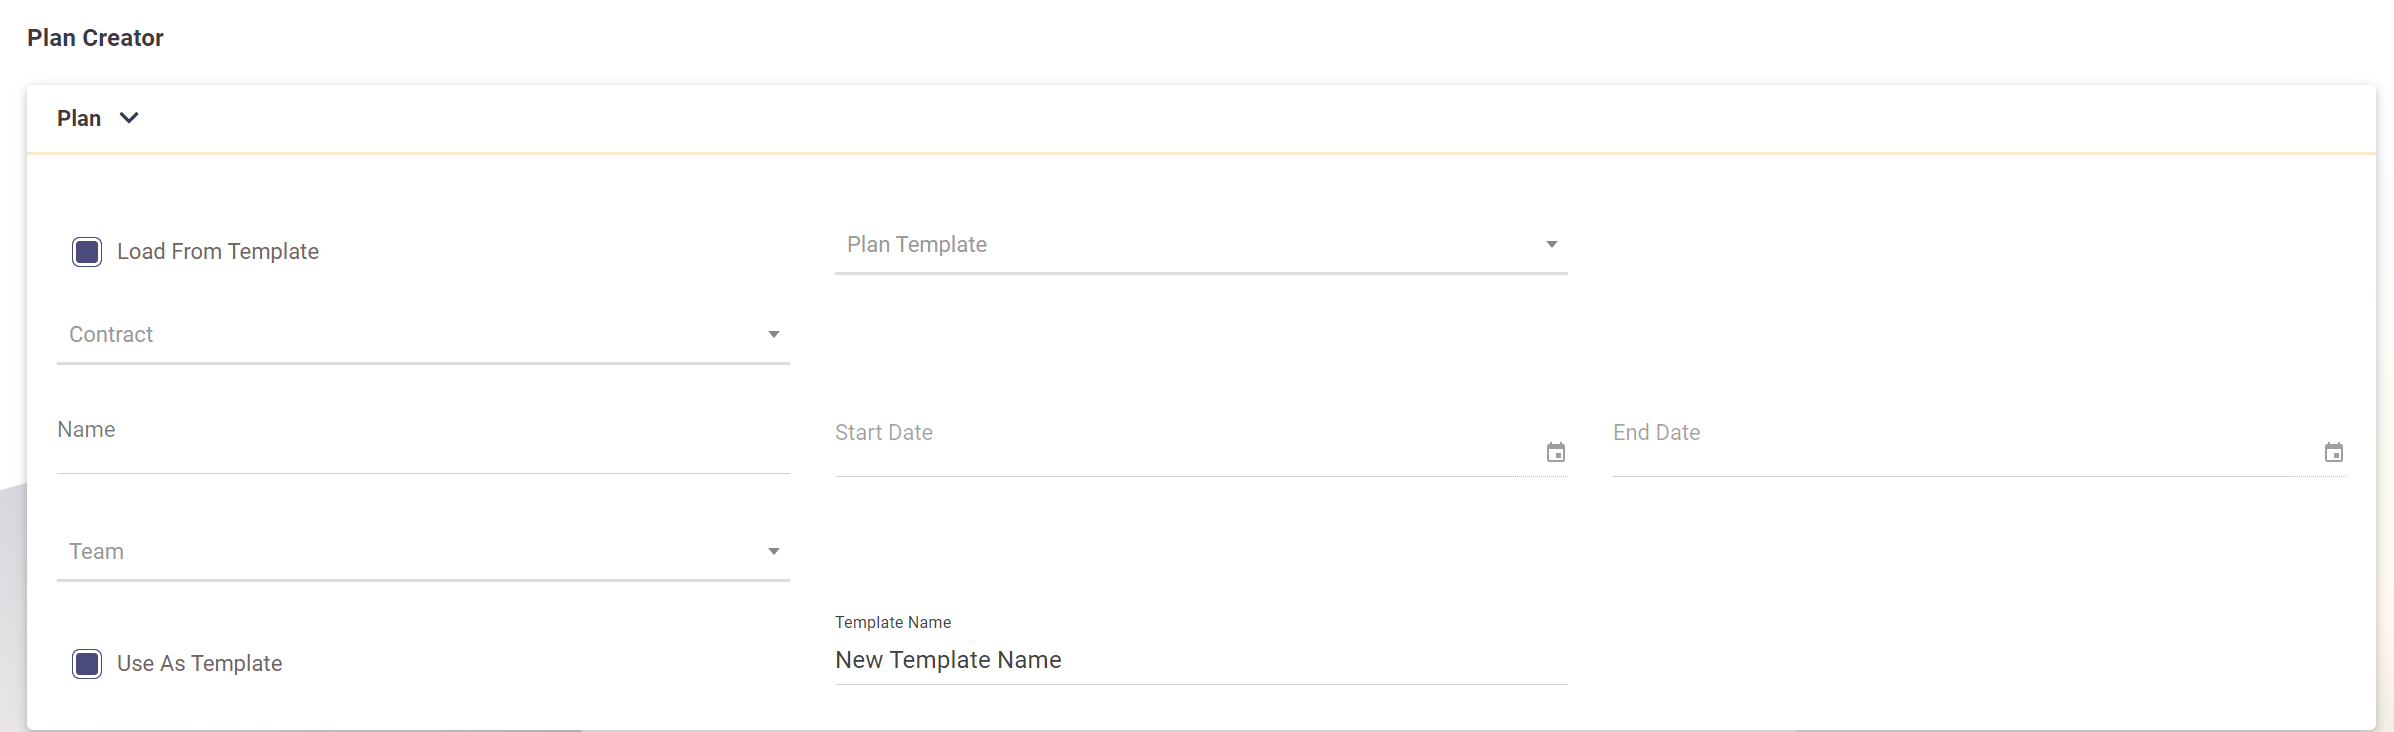
- Fill Out the Plan Fields:
- Plan Name: Enter a name for your plan.
- Contract (Optional): If applicable, select a contract from a predefined list of Contracts.
- Plan Team: Select a team from a predefined list of Teams.
- Template Options (Optional):
- Mark the plan as a template and enter a template name for future use.
- Load the plan from an existing template by checking the "Load From Template" checkbox and selecting a template.
- Plan Start and Deadline Dates: These will be automatically populated based on the first and last tasks in the plan.
- Adding Tasks to the Plan:
Expand the task form panel to begin adding tasks.
- Task Name: Provide a name for the task.
- Start Date: Defaults to today's date.
- Deadline: Defaults to two days after today's date.
- Assignee: Select from a list of team members.
- Parent Task: Choose from tasks that have been added to the plan without an assignee.
- Dependent On: Select from tasks already added to the plan. The start date of the current task will be set to the deadline of the dependent task.
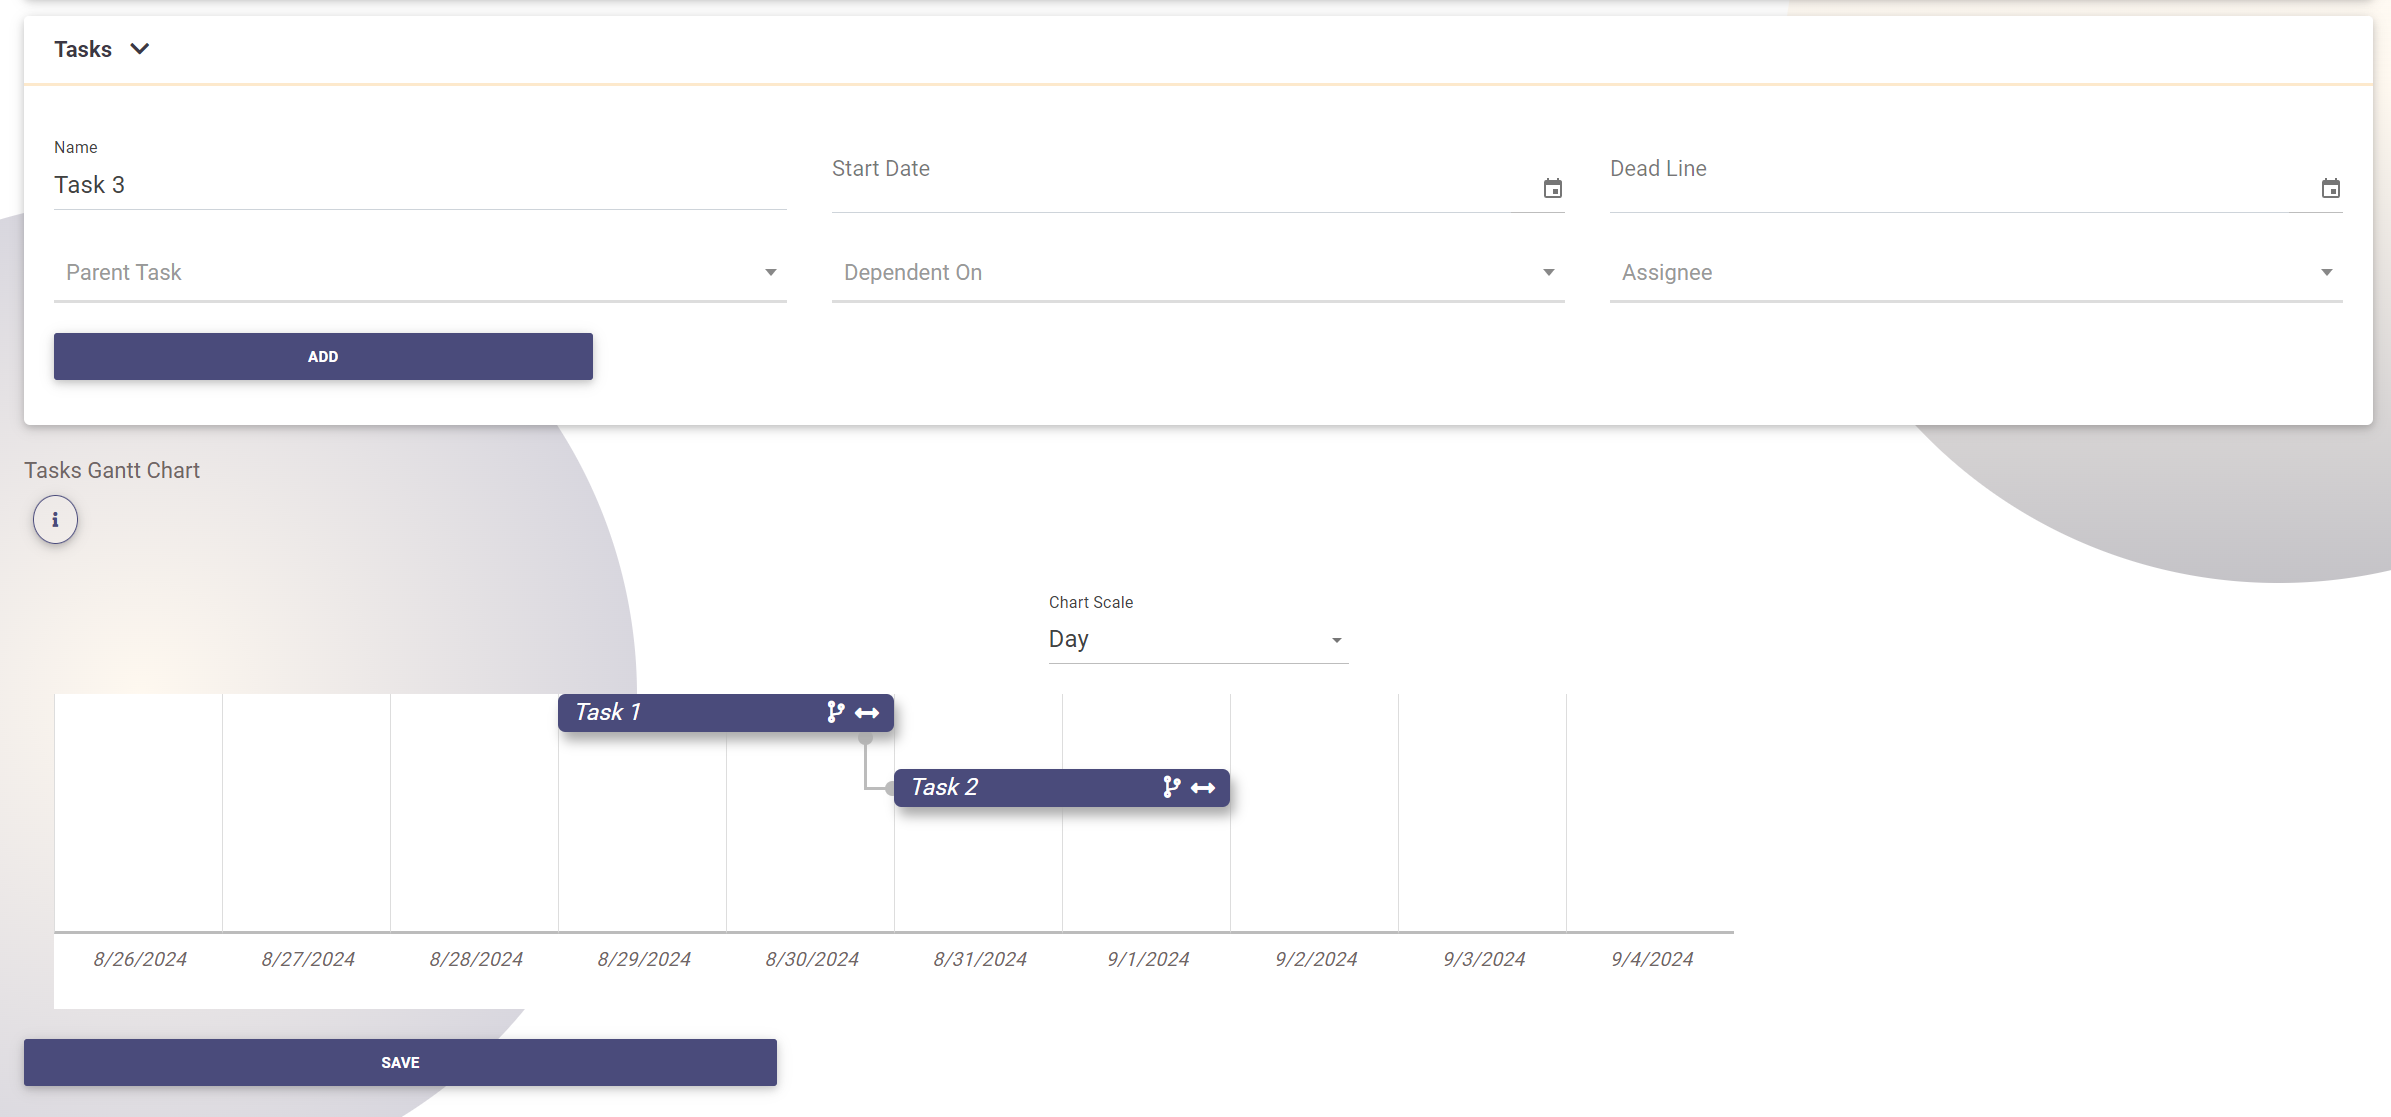
Click the "Add" button to add the task to the plan.
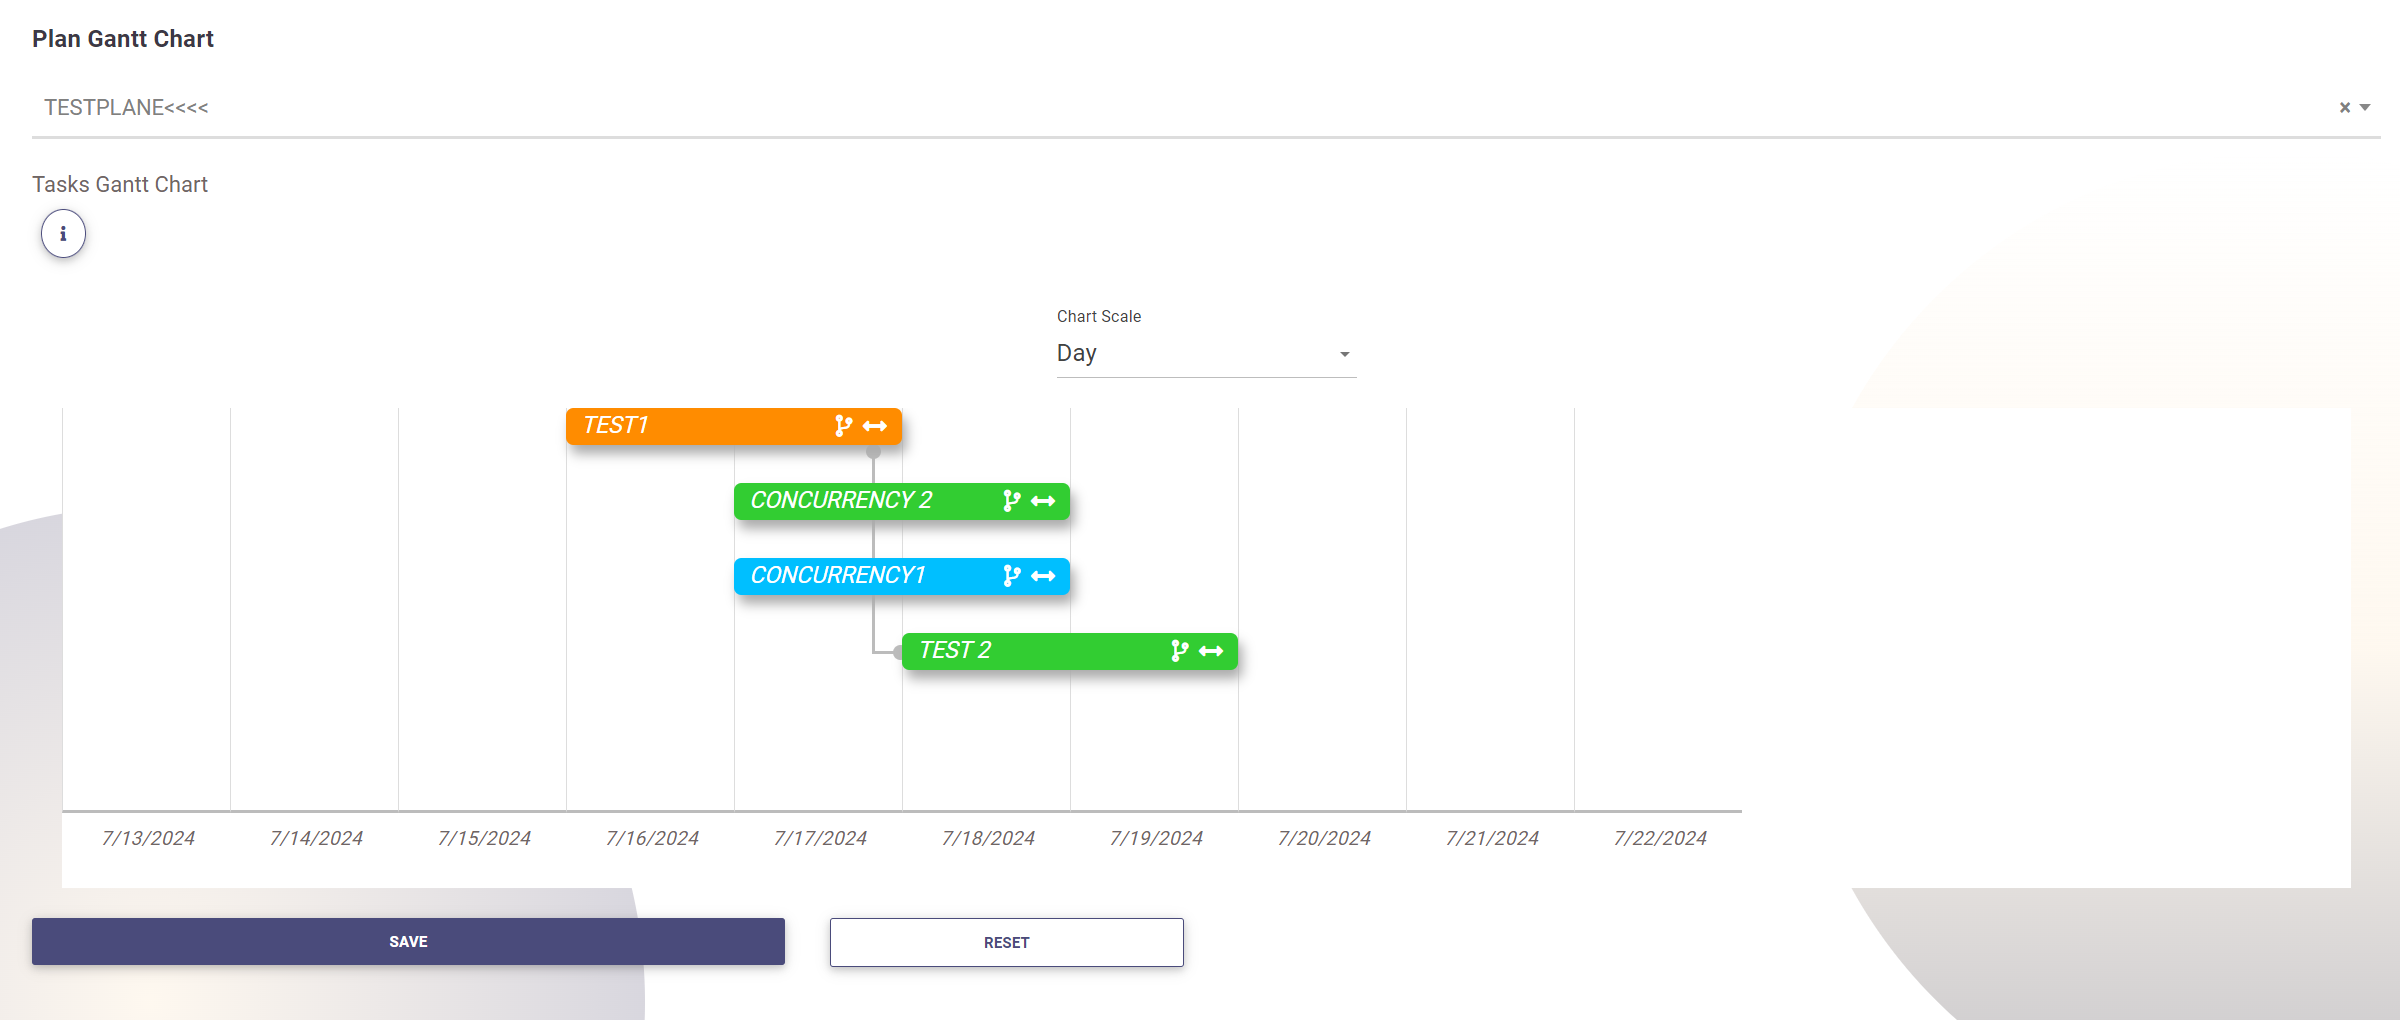
Managing Tasks in the Gantt Chart
Once tasks are added, they will be displayed in a dynamic Gantt chart with the following functionalities:
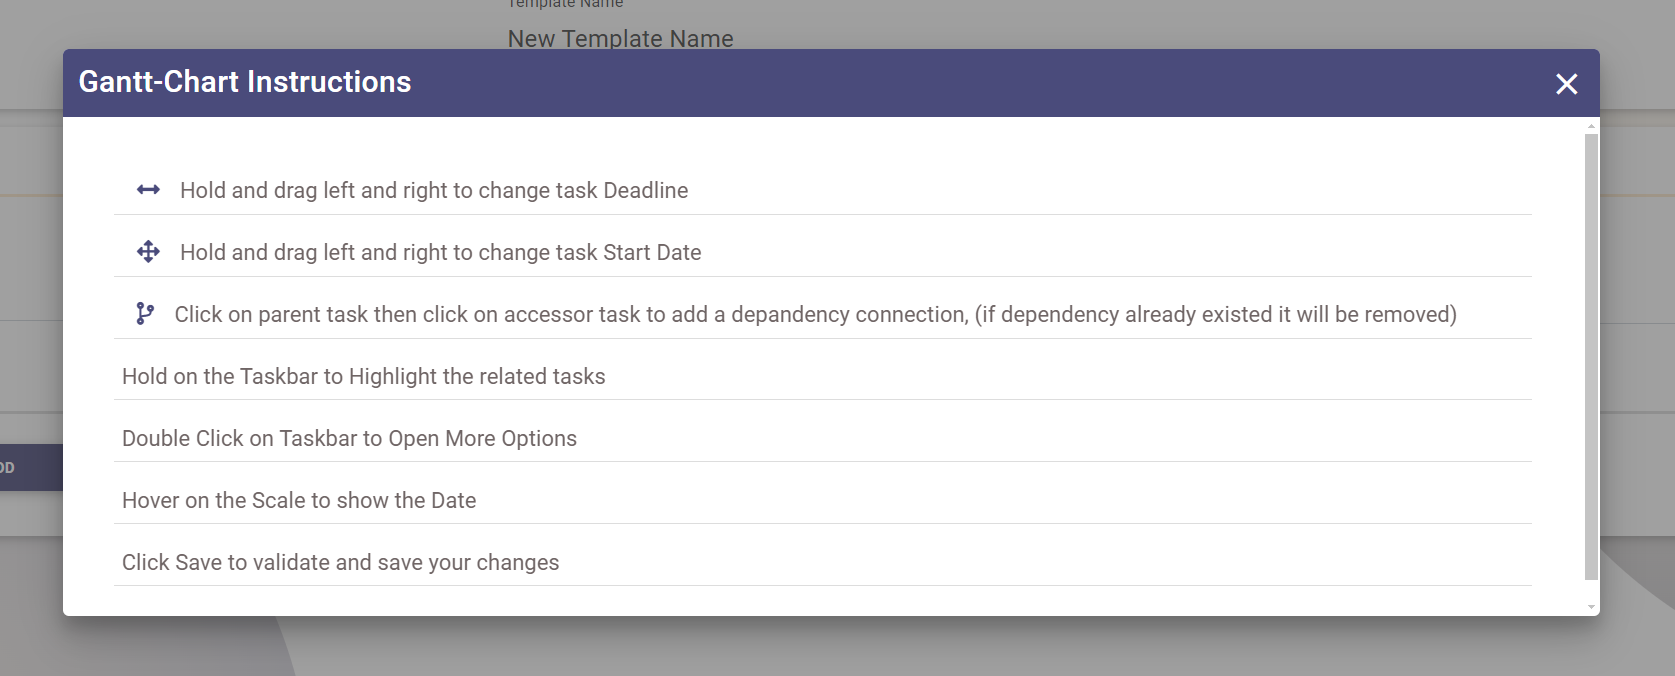
- Drag and Drop: Move the taskbar horizontally to adjust the task's start date.
- Resize: Extend or shorten the taskbar to modify the task's deadline.
- Link Tasks: Click on the branch icon on a taskbar, then click on another task to establish a dependency, indicating that the subsequent task can only start after the previous task ends.
- Parent Task Indicator: Tasks without an assignee (parent tasks) will be marked with a line above the taskbar.
- Task Details Popup: Double-click on a taskbar to open a popup window where you can fill in all task details.
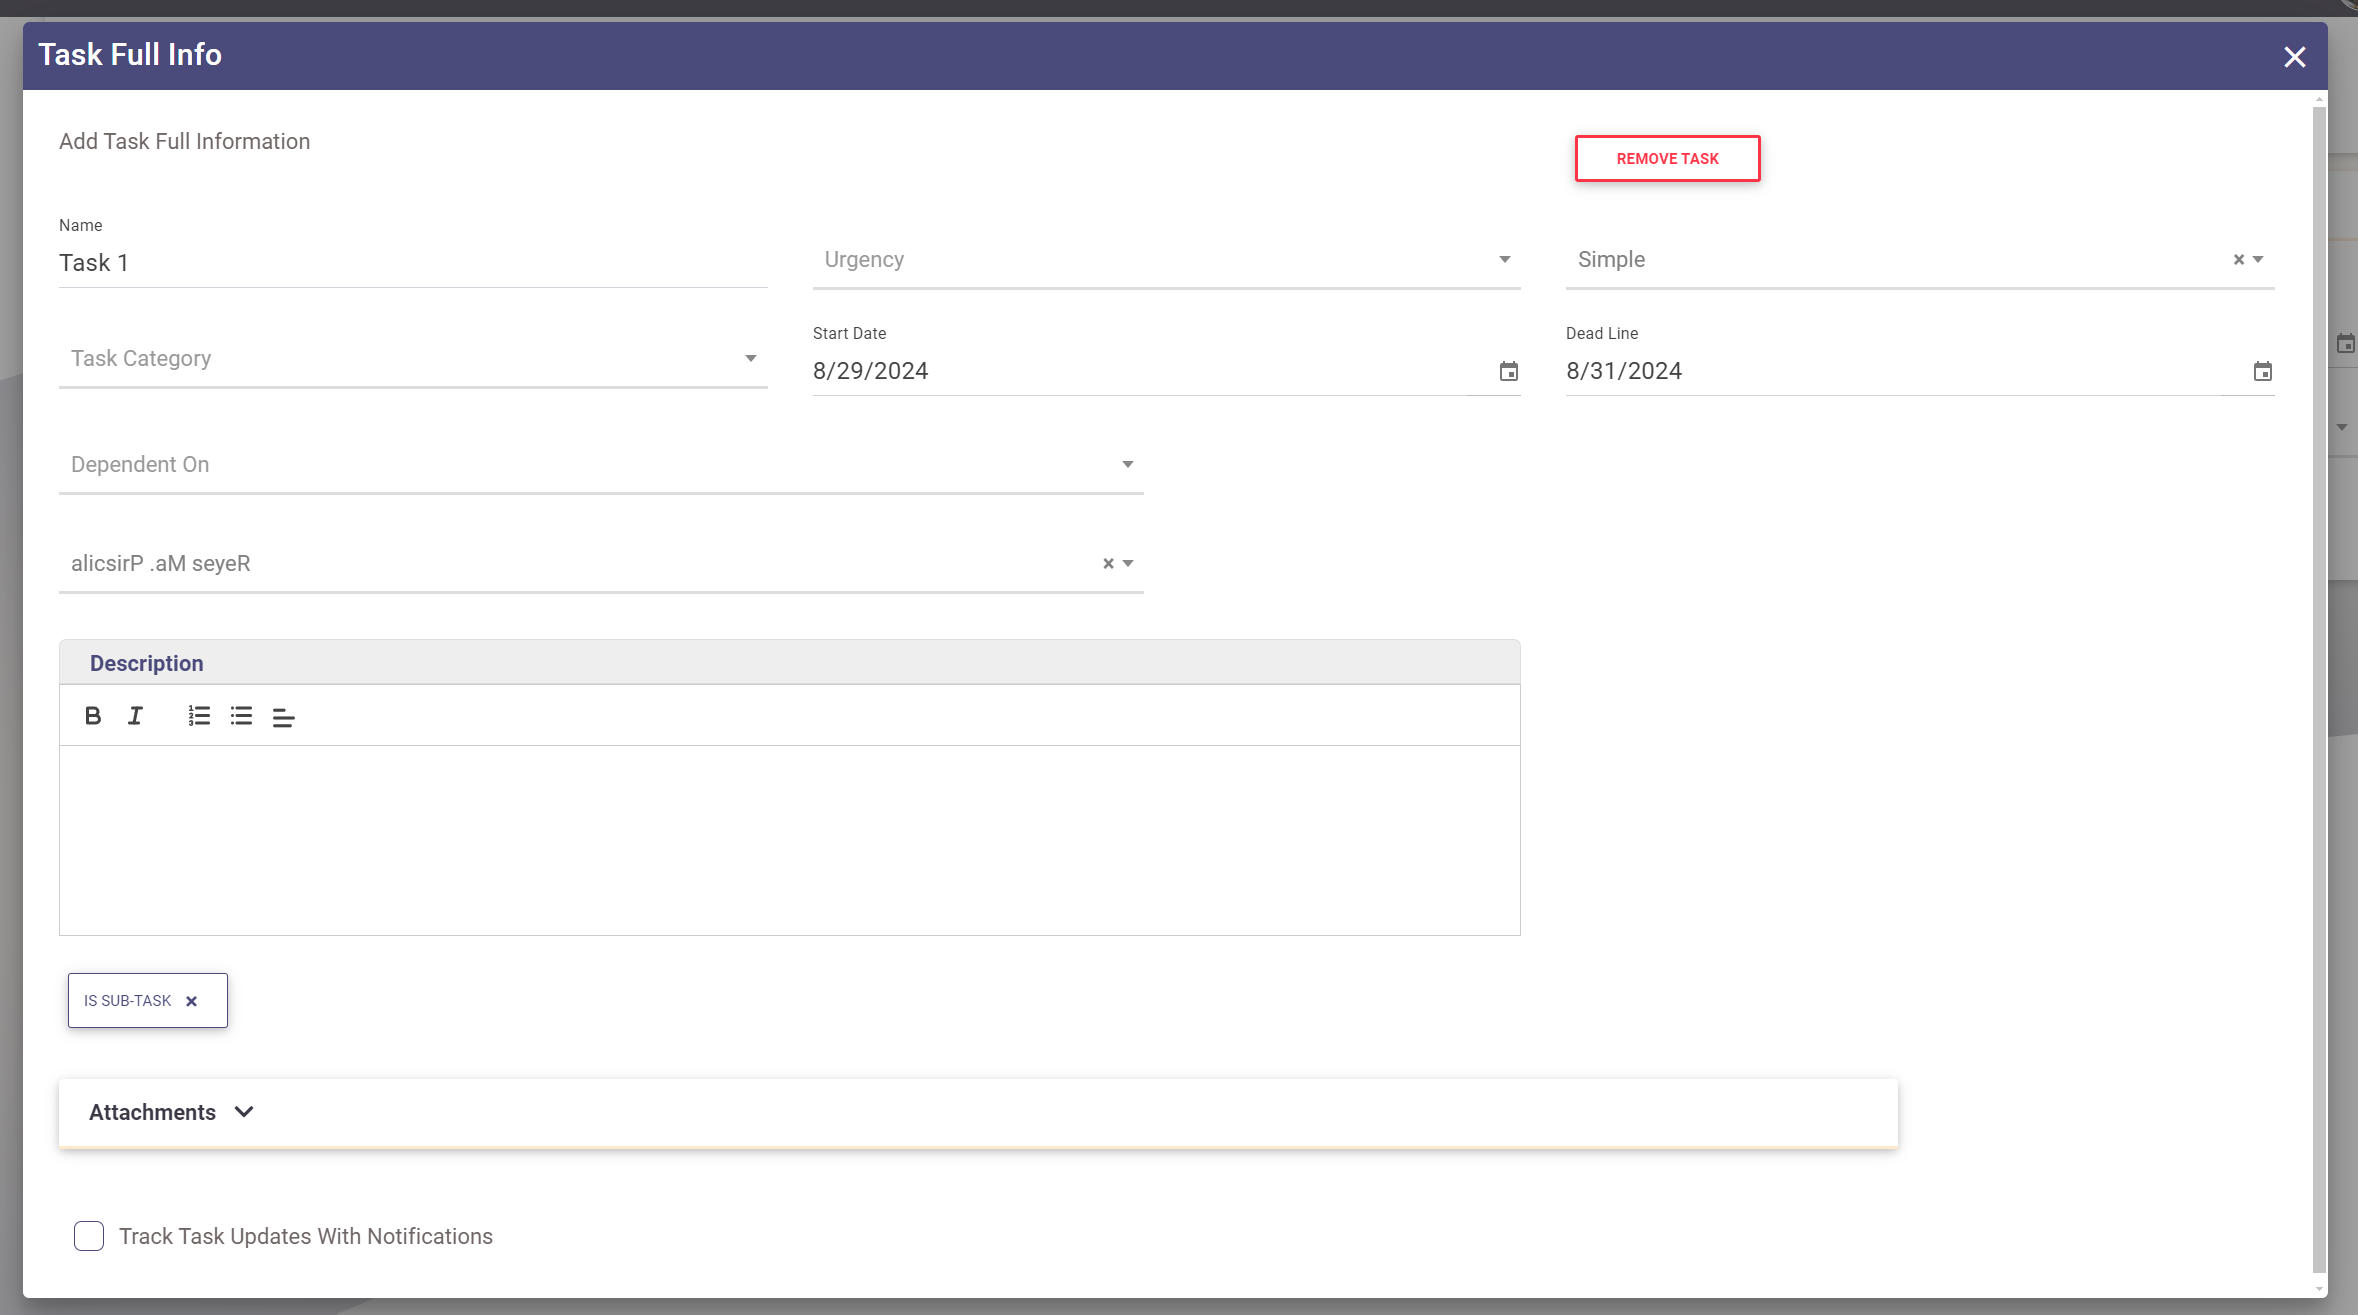
Full Task Details
In the task details popup, you can enter the following information:
- Name
- Urgency: Hot, Warm, Cold.
- Level: Simple, Intermediate, Complex, Advanced, and Expert.
- Assignee: When a plan's team is selected, the list includes all team members and leaders; otherwise, it includes all employees under the current manager.
- Description
- Parent Task
- Dependent Task: A task that must be completed before the current task can begin.
- Attachments: Upload task-related files.
- Track Changes: Check this box to monitor changes to the task and receive notifications.
- Remove Task: Click to delete the task from the plan.
Additional Features
- Gantt Chart Instructions: Click on the "i" icon above the Gantt chart to view detailed instructions on how to use the chart.
- Scale Options: Select the Gantt chart scale (day, week, or month) to adjust the view.
Saving and Editing Plans
After completing all the plan and task details, click "Save" to store your plan. To update an existing plan, go to the "My Plans List" and click the edit icon next to the desired plan. The system will open the plan and its tasks in the Plan Editor Pages, which includes all the functionalities of the Plan Creator.