Invoices
The Invoices feature in the Accounting module of your ERP system allows accountants to efficiently create, manage, and track invoices. This feature is designed to streamline the invoicing process, ensuring that all necessary details are captured and that invoices can be easily reviewed, edited, and exported. Additionally, the system provides options for scheduling payments, linking invoices to clients, and customizing invoice documents.
Check the Invoices Management in this Video
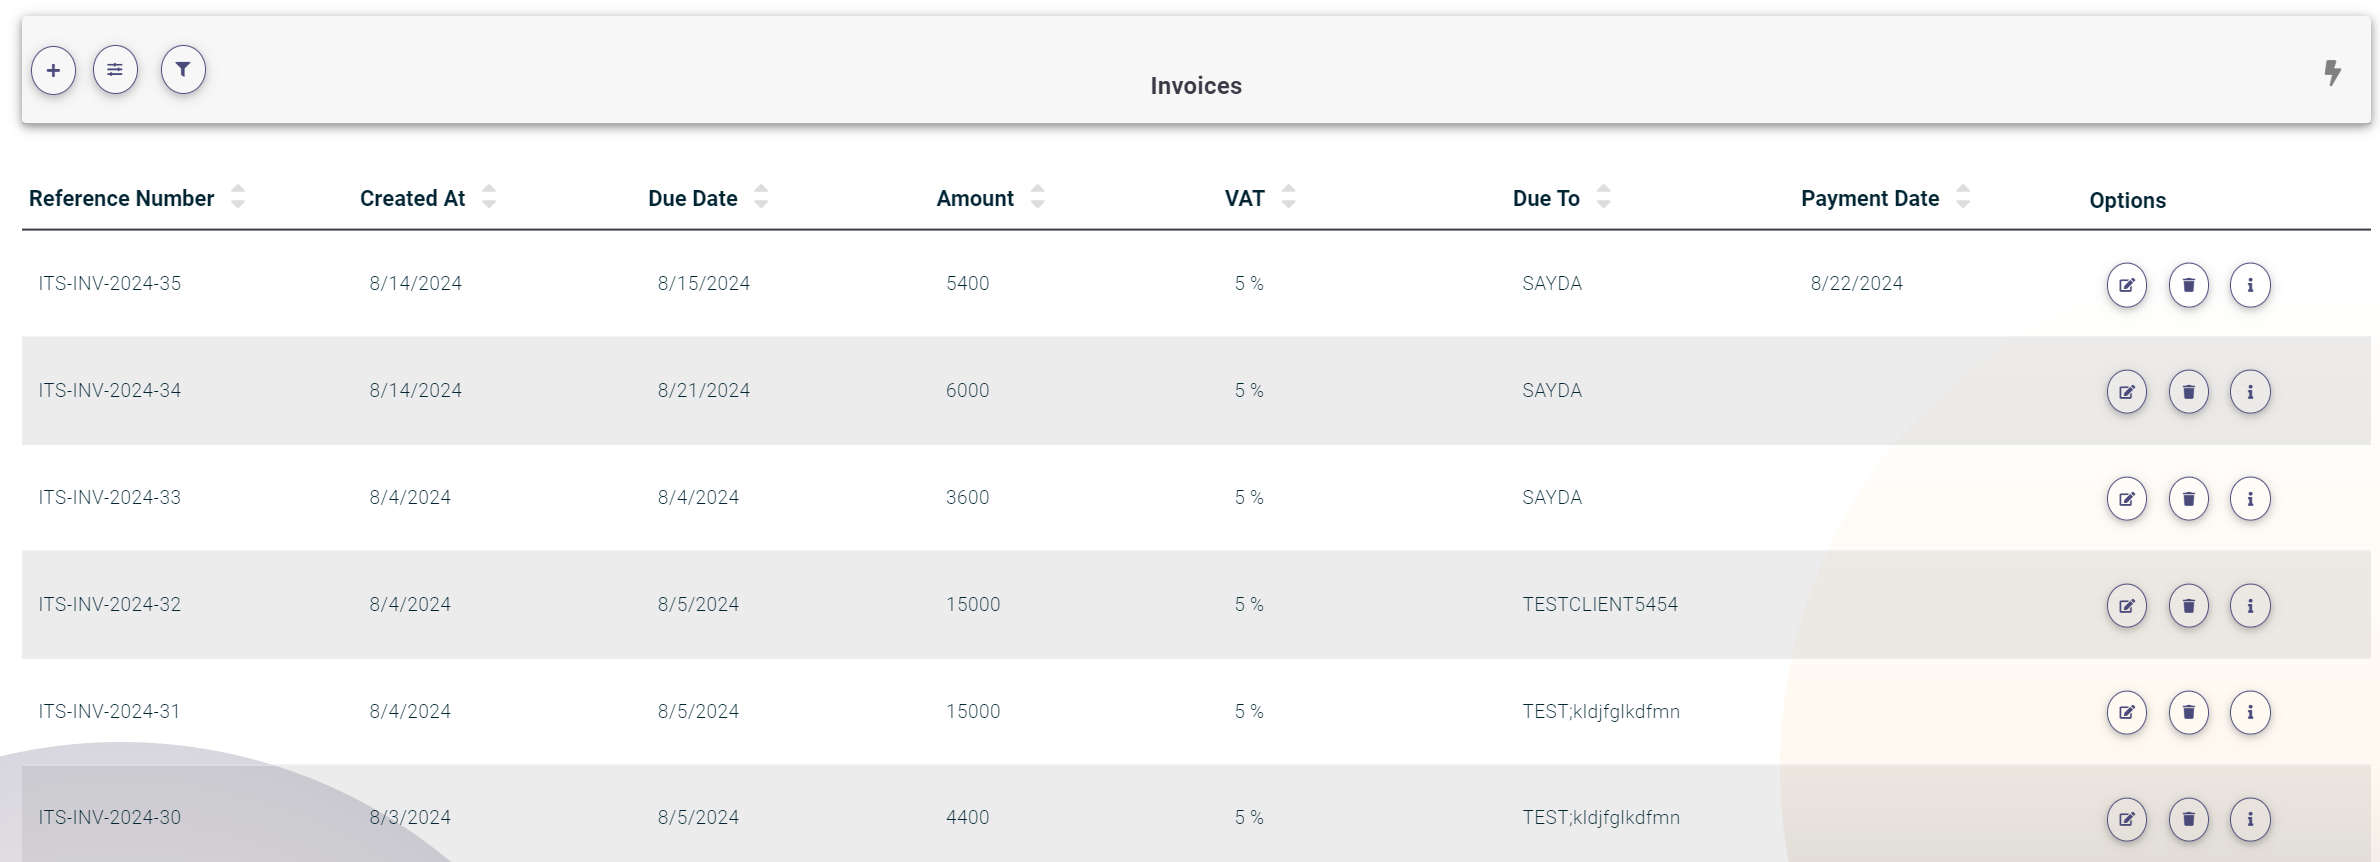
Navigate to the Invoices list under the Accounting menu to view all managed invoices. The system displays a comprehensive list of all invoices, including their current status.
Creating a New Invoice
To create a new invoice, click on the plus (+) icon at the top of the Invoices Pages. Fill in the following fields:
- Reference Number or Template
- Due Date: Specify the due date for the invoice.
- Company: Select the company from a predefined list of Companies .
- Bank Account: Choose a bank account from the predefined list of Bank Accounts.
- Amount: Enter the invoice amount.
- VAT Percentage: Specify the VAT percentage.
- Bill To: Enter the billing information.
- Receipt Number: Provide a receipt number if applicable.
- Client: link the invoice to a client by selecting from a predefined list of clients.
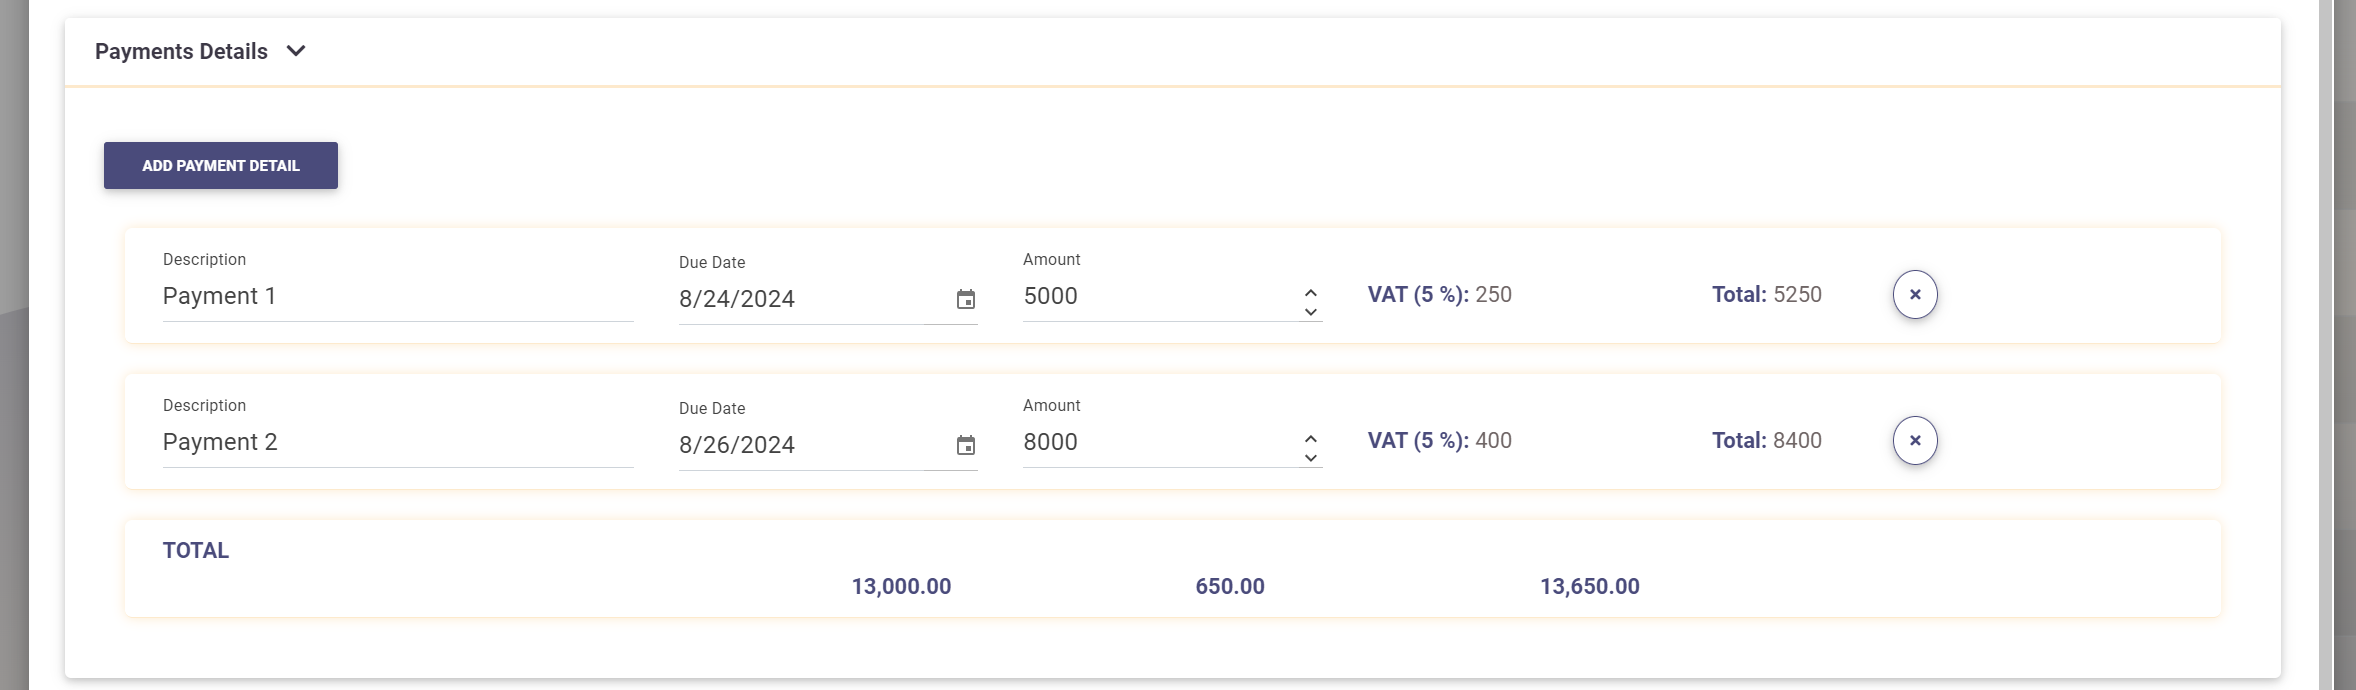
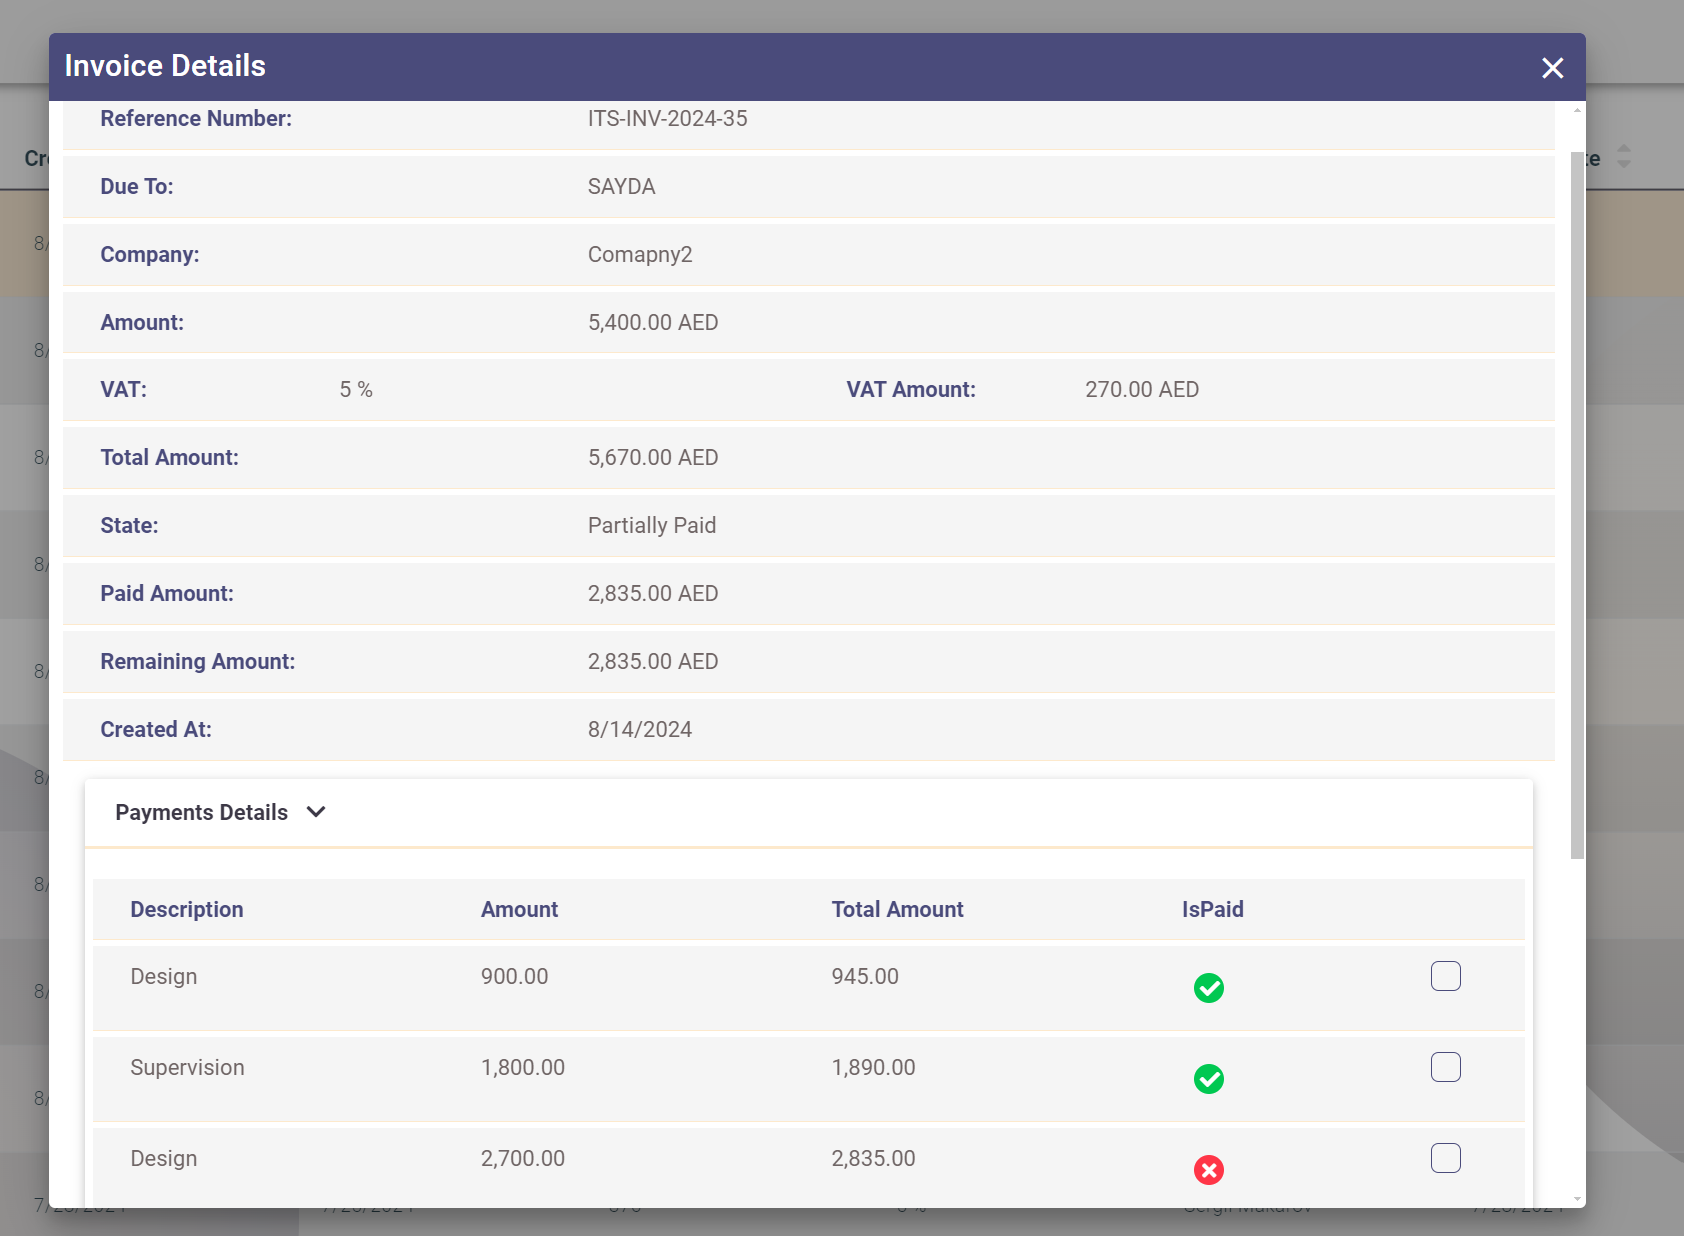
- Invoice Payments (Optional): Optionally, schedule the invoice payments. When payments are added, the invoice amount field becomes disabled and is automatically calculated based on the sum of all payments. Add payments by clicking on the Add Payment button and filling in the payment details (Description, Due Date, and Amount). The VAT percentage specified in the invoice details will be applied to all invoice payments.
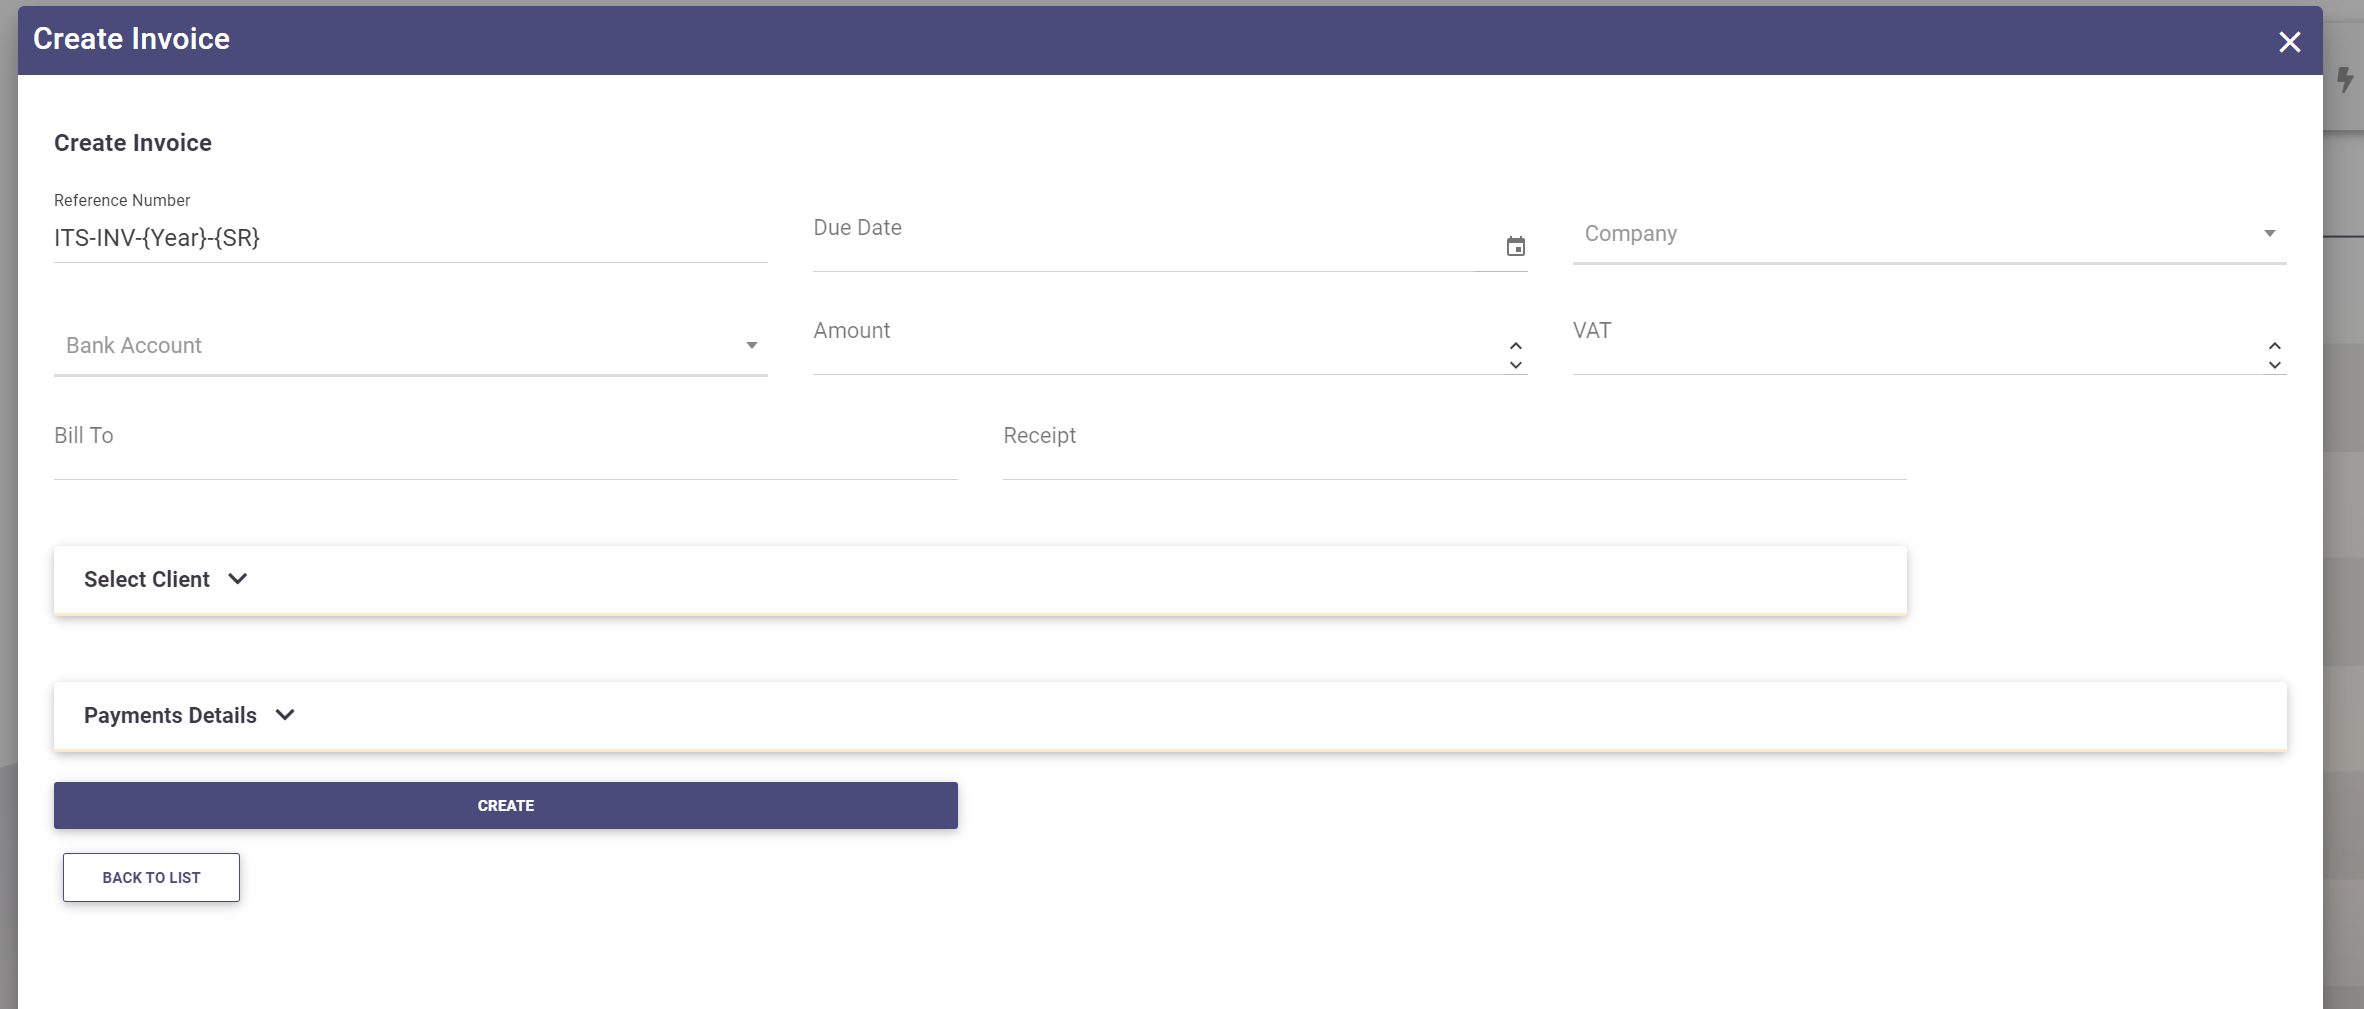
Finally, click on the Create button to save the invoice.
Editing an Invoice
To edit an existing invoice, access the Invoices list and click on the edit icon next to the desired invoice. The system opens a popup to update the invoice details and displays a list of scheduled payments.
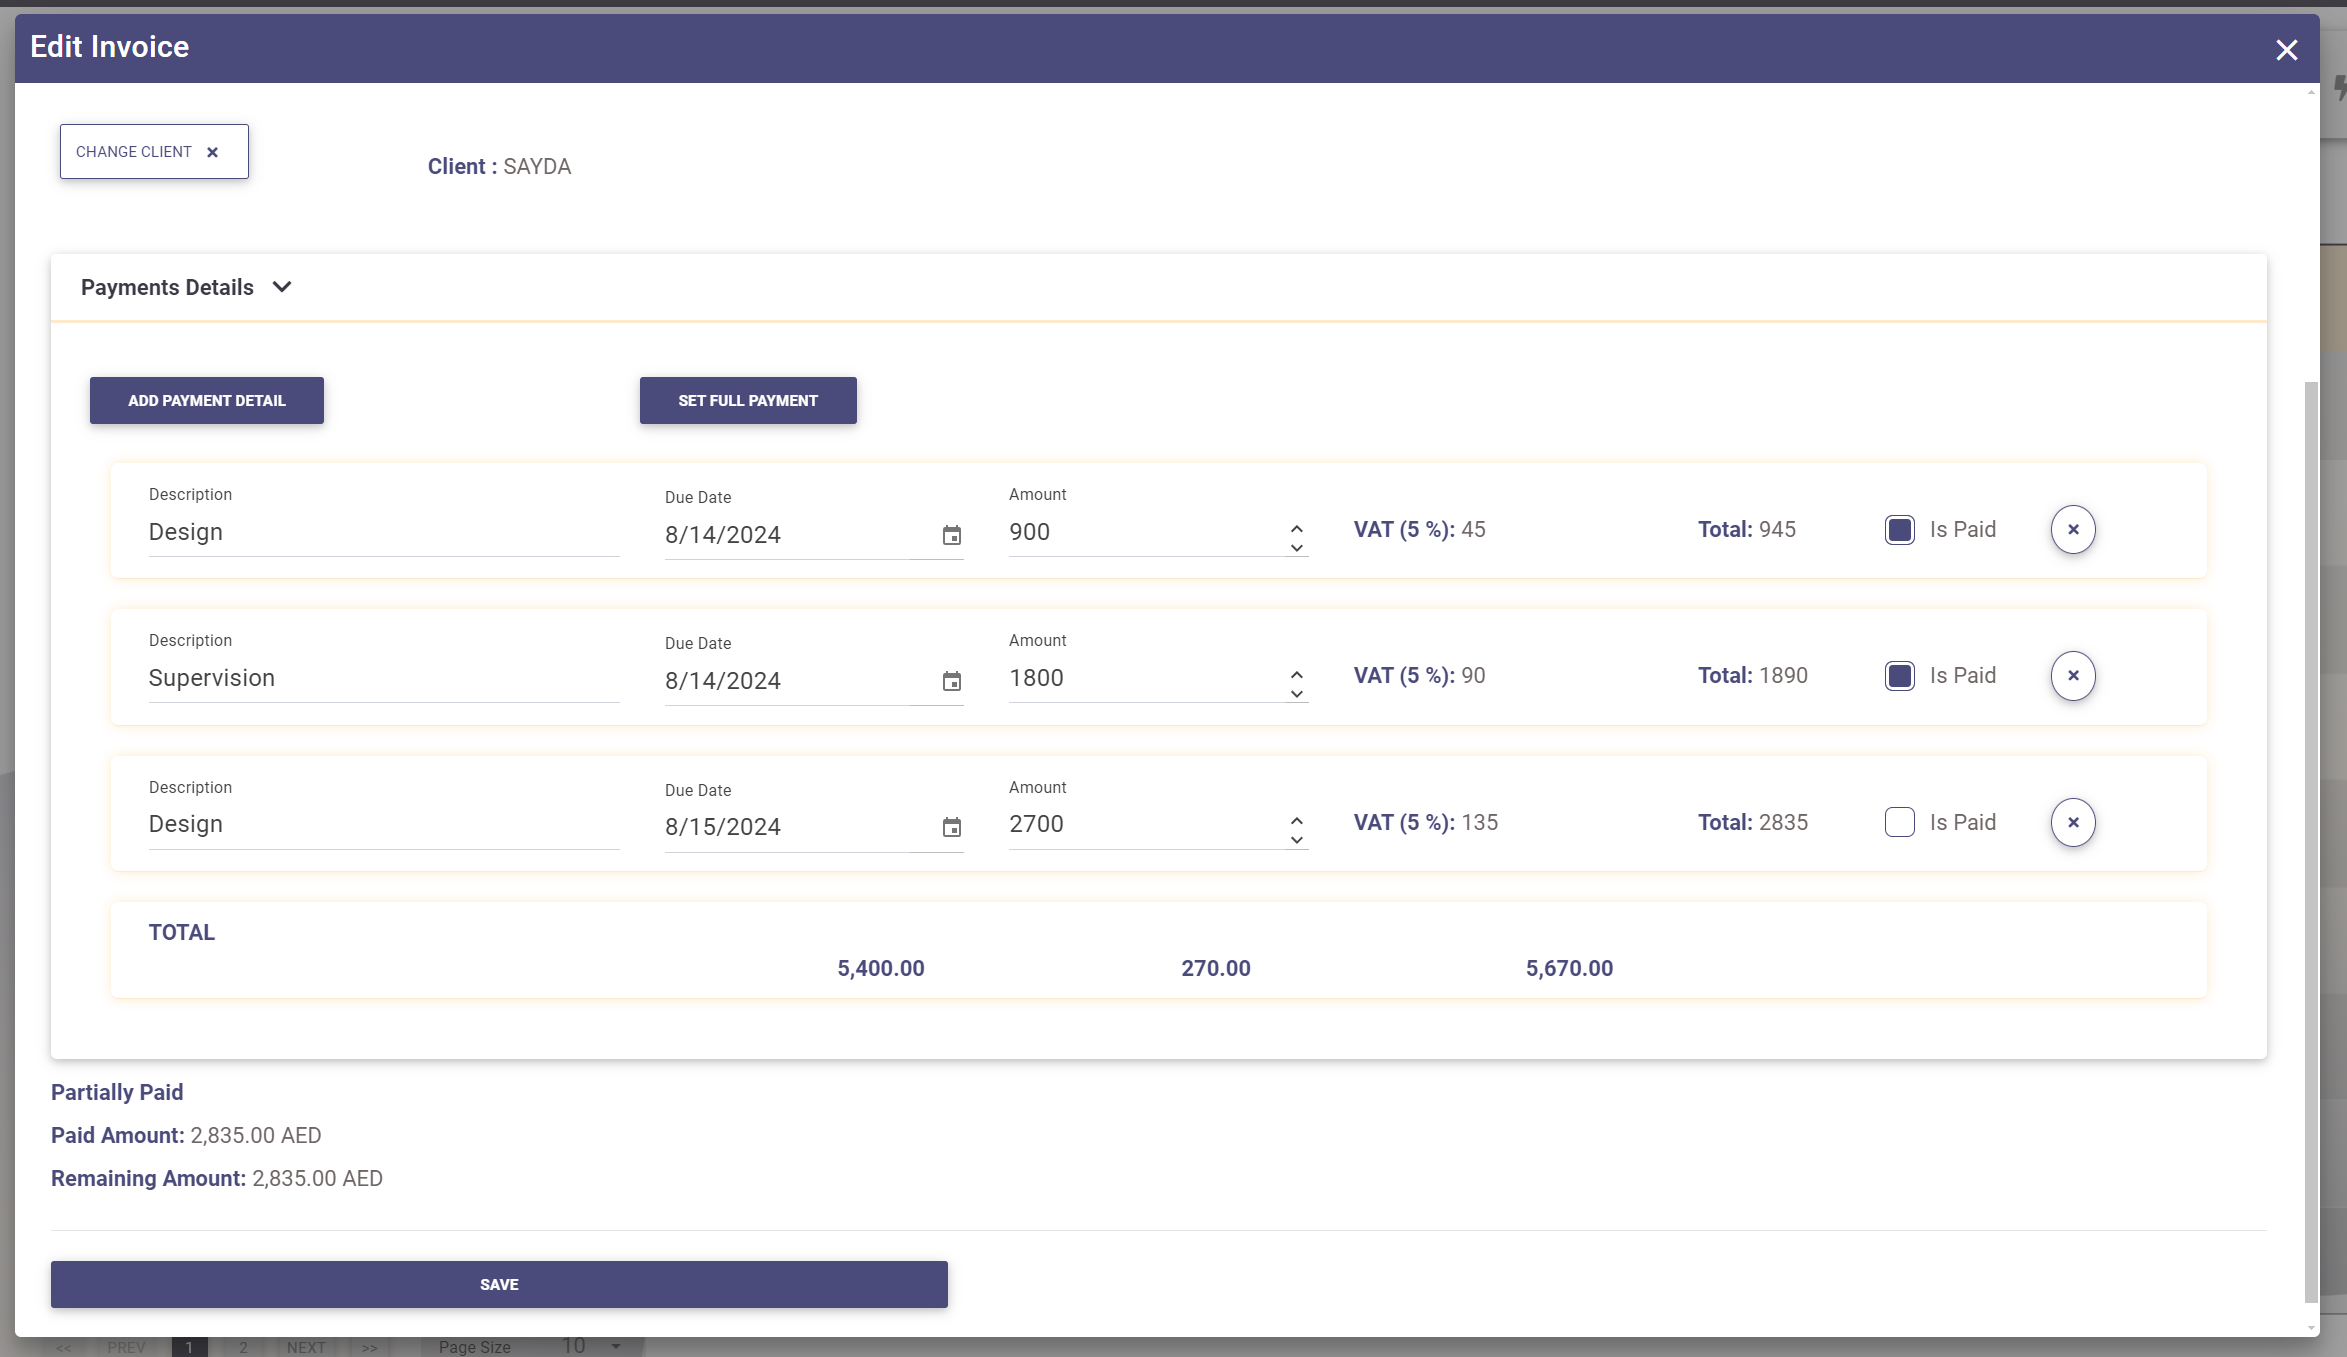
To mark an invoice payment as paid, check the isPaid checkbox next to the payment.
Optionally, you can mark all invoice payments as paid at once by clicking on the Set Full Payment button.
The system will then open a panel to fill in the payment transaction details.
Click on Save to save all changes.
Reviewing and Exporting Invoices
To review invoice details or export the invoice as a PDF, access the Invoices list and click on the (i) icon next to the desired invoice. A popup containing all invoice details will appear, along with a list of all invoice payments.
To export a Proforma Invoice, select the desired unpaid payments from the list by checking the checkbox next to each payment, then click on Generate PDF.
To export a Tax Invoice, select the desired paid payments from the list by checking the checkbox next to each payment, then click on Generate PDF.
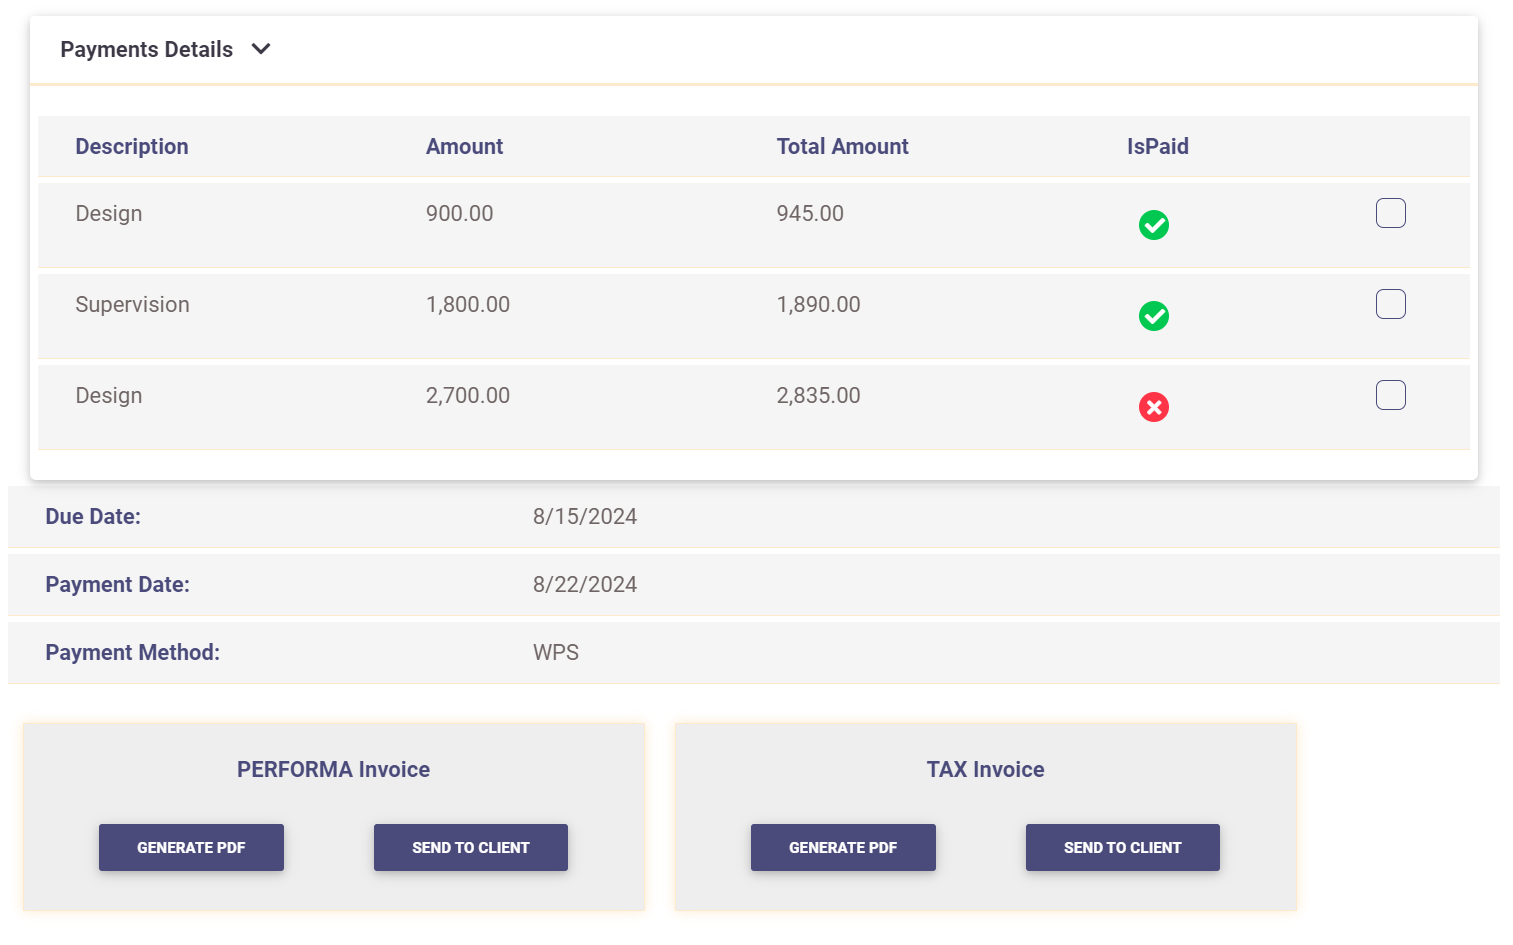
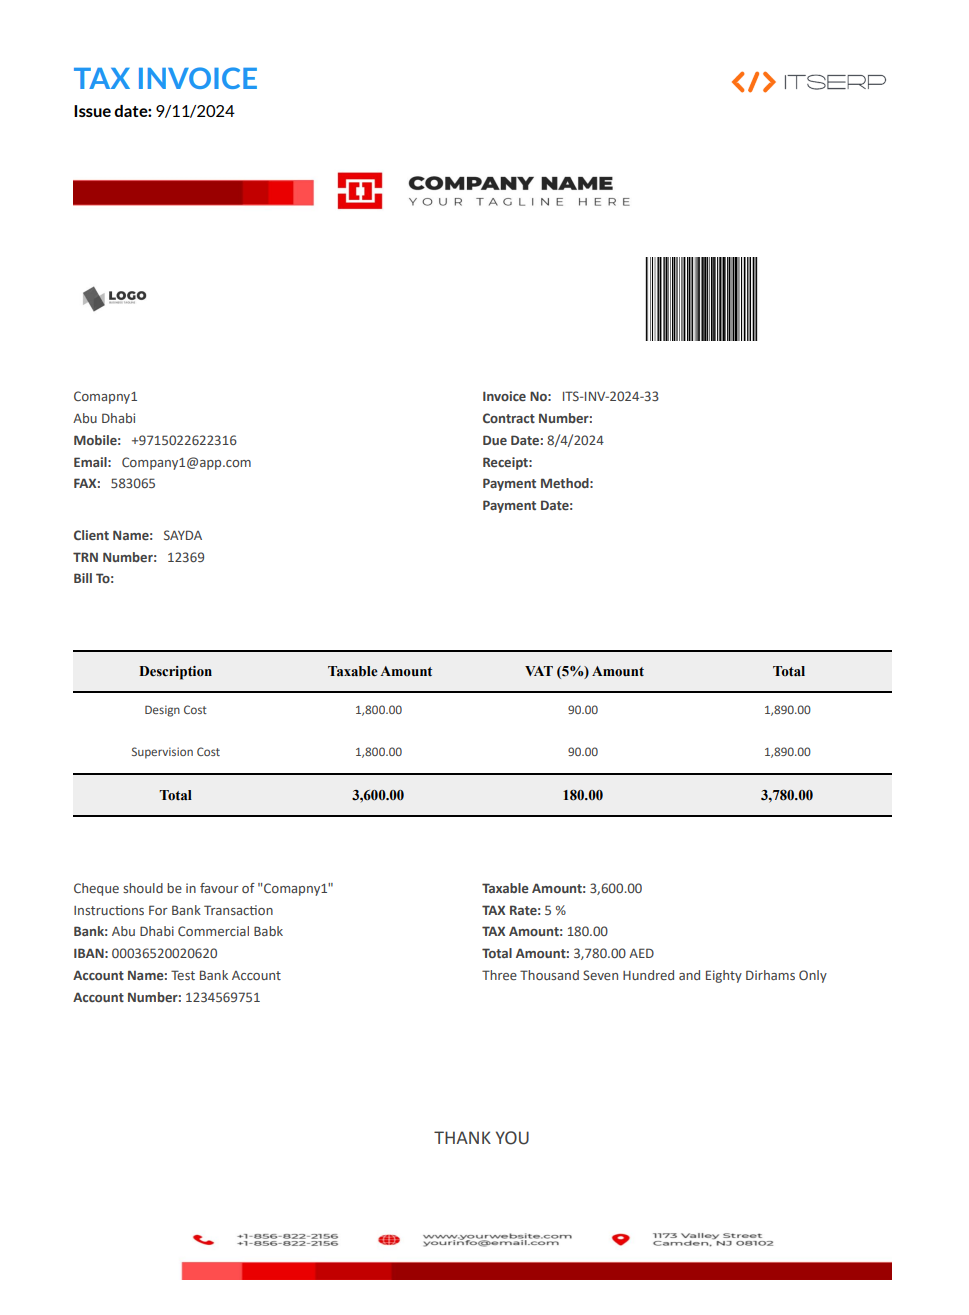
You can customize the generated invoice by setting the Company logo, letter header, and letter footer, which the system will embed in the exported invoices.
To send the invoice to a client, click on the Send to Client button, and the system will email the invoice as an attachment to the client's email address.